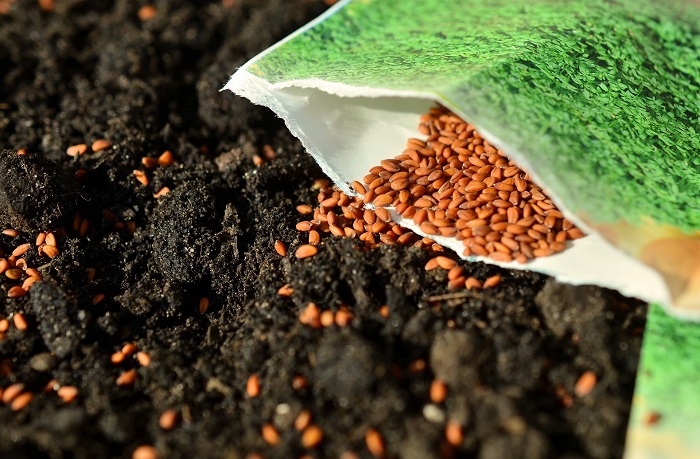
While we’re restlessly awaiting spring’s arrival to get back outside into the garden, now’s the perfect time to kick off this year’s planting season by starting seeds indoors. It’s easier than you think, cost-effective and immensely gratifying!
Why Start Your Own Seeds?
Along with the gratification that comes with growing your garden “from scratch,” benefits of starting your own seeds include:
- More variety than your local garden center. Even the most well-stocked places may not include the specific plant/plant variety you want.
- Healthier plants. Everything is under your control – you can ensure seed sources, growing medium, light, moisture – all aspects for optimum growing conditions.
- Heirloom varieties. When it comes to vegetables, most heirlooms produce better flavor and higher nutritional value. You’ll find varieties you won’t find in most garden centers, plus you’ll be maintaining an important part of agricultural history.
- Expansion of the selection of certain crops to grow, especially those that need a longer growing season than our area provides. Seeds can be started earlier indoors than outside, extending the growing season.
- Cost-savings. Whether you just want to have fresh herbs at your fingertips for meal prep, love the look of a particular heirloom bloom or are considering a sizable enough garden to offset your weekly grocery spending, starting plants from seeds are significantly more cost-effective than purchasing plants and produce.
What Are the Easiest Seeds to Start Indoors?
While most seeds can be started indoors, there are some plants that are more sensitive to being transplanted and do better when seeded directly into the garden. These include: root vegetables such as carrots, beets, and radishes and some cool weather crops like peas, and lettuces. Seeds of fast growers like squash, zucchini and beans also do better when sown directly into the garden soil.
Long season crops, like eggplants, okra, tomatoes, broccoli and kale are some of the easiest seeds to start indoors, and benefit from the longer growing times this affords. Other easy seeds include marigold, coleus, zinnia, brussels sprouts and cauliflower.
What You Need to Start Seeds Indoors
Like most living things, seeds need the right environment in which to set down roots and grow, plus water and – once they sprout – light. It may come as a surprise to learn that most seeds don’t need light to sprout, but they DO need light to grow once they’ve sprouted. Some exceptions to this rule include coleus, begonias and primulas, whose seeds require light to sprout. You’ll find such information on the seed packet.
Seed Containers – you can purchase something made specifically for growing seeds like Jiffy peat pots or utilize items like K-cups, yogurt containers, or plastic clamshell berry containers to start your seeds in. Make sure to make holes in the bottom of containers for drainage if none exist.
Growing Medium – Two options include potting soil or seed starting mix. Seed mix is finer in texture than potting soil and is especially lightweight to allow tender sprouts to break through more easily. It contains elements like peat moss, coconut coir, vermiculite, and perlite. Potting soil is denser, with a coarser texture, and often contains actual soil along with compost vermiculite, peat moss and sometimes fertilizer.
Ideally, seed mix is used for germinating and once it reaches the seedling stage, is transferred to potting soil. There’s no harm is setting seeds directly into potting soil – they’ll just have to work harder to push through the denser medium – but check to see if there’s fertilizer included in the mix. A small amount won’t negatively impact the seedlings, but too much (typically found with artificial fertilizers) can burn delicate seedlings.
Carefully read the label before you purchase any growing medium, since they can go by different (and confusing) names. Potting mix, and soil-less mix are other names for seeding mix. The best way to determine what you’re buying is to check the ingredients – potting soil will include soil, sand or compost. Seed mix will not include any of these.
Light – Adequate light is critical for seedling growth. A southern-facing window may provide good light but be careful of cold air drafts. Rotate seedlings to encourage even plant growth. If light isn’t sufficient, consider getting a grow light. Flexible grow lights allow you to keep the light close enough to the seedling, so it doesn’t get spindly, and flexible enough to accommodate its growth.
Heat – Ideal temperatures for growing seeds is between 70-75 degrees Fahrenheit. If you keep your home’s temperature below that, consider a heat mat for your seedlings. Heat mats provide stable, optimum heat and work especially well for tomatoes, melons and peppers.
You can also create a warm, greenhouse-like environment by placing trays of seeds in clear Sterilite-type containers, removing the cover as the house warms during the day and replacing it before the house cools off at night. You can also tent seedlings with clear plastic bags or the tops of clear plastic berry containers to trap and maintain the day’s heat overnight.
Moisture – Moisture is vital for seed germination, but too much moisture in young seedlings can cause “damping off.” Seedlings will appear healthy one day, then quickly wither and collapse. According to the University of Minnesota Extension, “The fungi, Rhizoctonia spp. and Fusarium spp., along with the water mold Pythiumspp, are the most common pathogens responsible for damping off.” This most often occurs when humidity exceeds 85%. Cold, wet soil makes seedlings especially susceptible to damping off. Try watering from the bottom and only water enough to keep some moisture for the day – avoid soaking. Once seedlings grow enough to have a true set of leaves, damping off becomes less of a concern.
Seeds – Fresh seeds have a higher rate of germination, so make sure the seeds you purchase are packaged for sowing in the current year. Online seed resources typically update their websites during the winter, and you should start seeing seed catalogs arriving in January and through the winter months. Ordering early ensures you get the seeds you want before they sell out.
Once you have purchased seeds, maximize their shelf life by keeping them dry and in a cool, dark spot. Store them in airtight containers like seed envelopes or glass jars. You might consider adding a silica gel pack for added dryness assurance.
Seeds can be stored for up to one year without having it affect germination, and many seeds can still be viable longer than that. You can check seed viability by placing them in a container of water for 15 to 20 minutes. If the seeds sink, they’re good to plant. If they float, there’s a high chance they won’t sprout.
You can purchase seeds at your local garden center or online at these trusted seed companies:
- Burpee (burpee.com)
- Seeds of Change (seedsofchange.com)
- Seed Savers Exchange (seedsavers.org)
- Johnny’s Selected Seeds (johnnyseeds.com)
- Park Seed (parkseed.com)
- Eden Brothers (edenbrothers.com)
Planting Your Seeds for Initial Indoor Growing
You should plant seeds indoors 6-8 weeks before the last average frost date. In our area, that’s between May 1-15.
Planting the seed at the right depth is important. You can find this information on most seed packets. A good rule of thumb is that the seed needs to be planted at a depth twice the diameter of the seed. Loosely pack soil into seed container so it’s not too compacted, discouraging root growth, then lightly water after planting.
Seed Leaves vs. True Leaves
The first tiny set of leaves you see after a seed germinates are called Cotyledons, or seed leaves. They are part of the seed itself and appear when the seed sprouts, storing food for the seedling until the true leaves are established enough to perform photosynthesis.
Common Problems
Damping off (sudden wilting) – As noted earlier, soil that is too wet, or too damp and cold can cause fungus to grow that will kill the seedling, called “damping off.” If this happens, quickly remove the affected seedling to avoid fungal spread.
- Ensure containers have adequate drainage
- Don’t overwater
- Water from the bottom
- Ensure seedlings have a warm, draft-free environment
Leggy plants/spindly growth
Insufficient light – Particularly in our northern climate, insufficient light is a common cause of these issues. Consider adding supplemental grow lighting.
Cramped spacing – As seedlings begin to grow, they can compete for light when they’re too close together. Space them further apart to avoid resource competition.
Too much heat – If you’re using a heat mat, you may need to lower the temp a bit. High temperatures can cause rapid growth, leading to leggy plants.
Poor Root Development
Poor drainage – Make sure your container has adequate drainage and that you don’t overwater.
Compact soil – Soil that is packed too tightly will make it difficult for tender seedlings to grow strong roots. Keep soil loose and light.
Low temperature – Chilly soil inhibits root growth. Make sure the soil is adequately warm and free from drafts – a common issue when placed by windows.
Photo of seeds / main image photo credit: Pixabay

